
How to Apply Vinyl Decals to Car Windows Without Bubbles (Step-by-Step Guide)
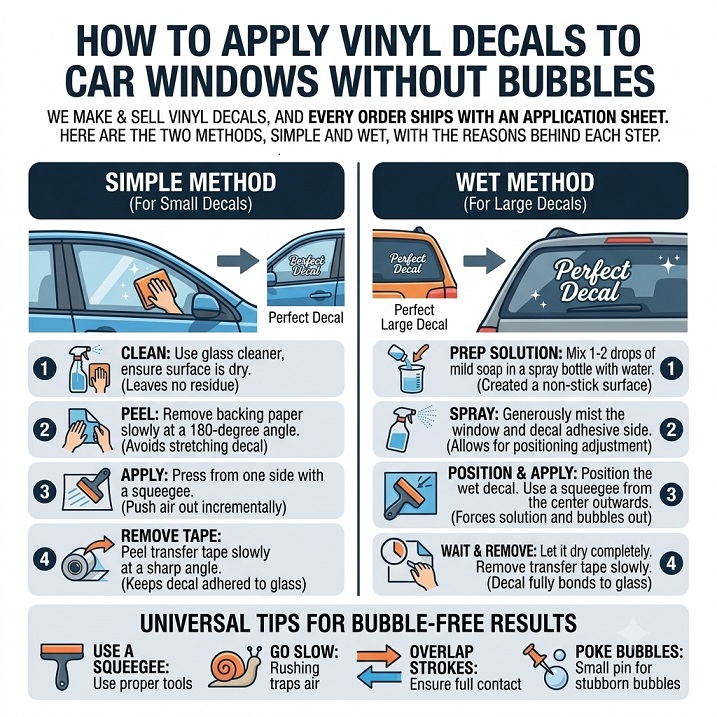
We make and sell vinyl decals, and every order ships with an application sheet. Over the years the instructions have settled into two methods: a simple one for small decals, and a wet method for large ones. Here’s both, with the reasons behind each step.
First: Which Method Do You Need?
- Small decals: the dry method. Fast, and there’s little that can go wrong.
- Large decals: the wet method. A large decal is hard to place accurately in one go, and once the adhesive touches glass it grips. A thin layer of soapy water lets you slide it into position first.
If you’re not sure, a rough rule: if you can’t comfortably hold the decal flat with both hands, use the wet method.
Before Either Method: Clean the Glass Properly
This is the step most people skip. Glass can look clean and still carry wax, oil or polish residue that weakens the adhesive.
Wipe the area with isopropyl alcohol (rubbing alcohol). Soap and water alone won’t remove wax. Do it right before applying, and let it evaporate. Surface oil and wax are the most common reason a decal peels early, so don’t rush this.
Method 1: Dry Application (Small Decals)
- Wipe the glass with isopropyl alcohol and let it dry.
- Peel off the backing paper, keeping the decal stuck to the transfer tape.
- Position the decal and press the center down first.
- Use a soft squeegee and work from the center outward with steady pressure to push out air.
- Peel the transfer tape back at a low angle, flat against the glass, so the decal stays behind.
Method 2: Wet Application (Large Decals)
- Degrease the surface. Wipe the glass with isopropyl alcohol.
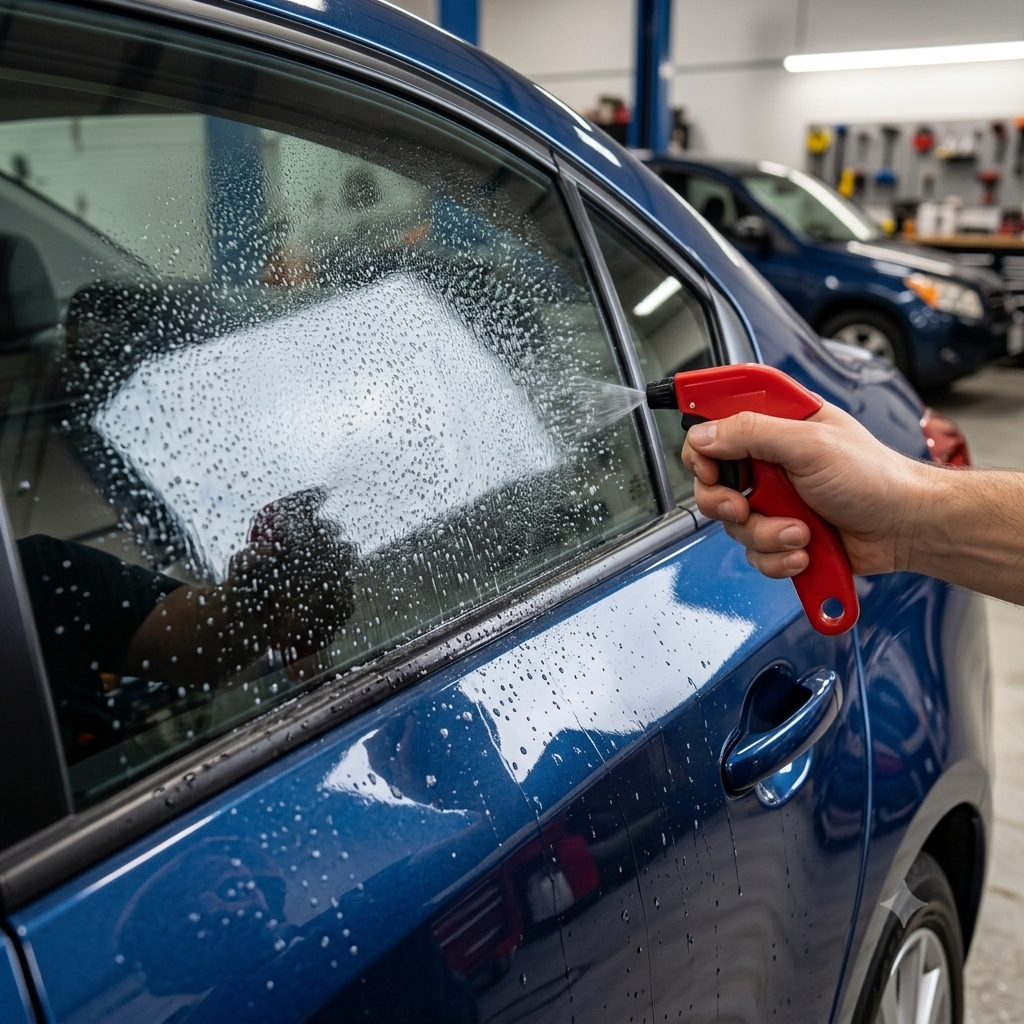
- Spray soapy water. Fill a spray bottle with water and a small amount of mild soap, then spray an even layer over the whole area where the decal will go. Use only a little soap — too much can weaken the bond.
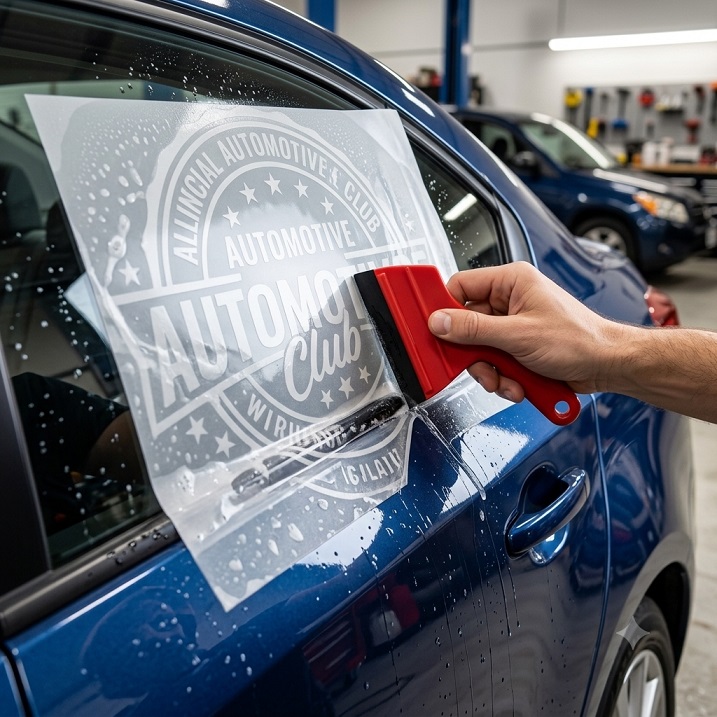
- Remove the backing and apply. Peel the backing paper off, then lay the decal on the wet glass. Because of the water, you can slide it left and right and line it up level before it grips. This is the big advantage of the wet method.
- Squeegee the water out. Once it’s in position, use a squeegee to push the water out from the center to the edges. Keep pressure firm and even.
- Dry the remaining moisture. Some water is still trapped under the decal and it hasn’t bonded yet. Use a hair dryer or heat gun to evaporate it, keeping the heat low and moving so the vinyl doesn’t melt or distort. Don’t drive the car at this stage — the decal can peel off or fly away.
- Remove the transfer tape after 2–3 hours. Leave it on until then, then peel it off slowly at a low angle, pressing the decal down as you go.
If a corner lifts with the tape, press it back down, give it more time, and try again.
Tips That Help Either Method
- Temperature: Work in roughly 10–32°C (50–90°F). Too cold and the adhesive won’t wet out; too hot and the vinyl gets soft and hard to control.
- Keep heat gentle on glass. Glass heats unevenly, so keep the dryer moving rather than holding it in one spot.
- Outside vs. inside: Most decals are meant for the outside of the glass. If you apply to the inside, the design has to be mirrored so it reads correctly from outside.
- Rear window defroster lines: Applying over them is fine, but be careful when you remove a decal later — don’t use a metal razor on the glass or the defroster grid can be damaged.
- Bubbles: Small ones sometimes disappear on their own after a few days in warm weather. For a stubborn one, prick it with a fine pin and press the air out through the hole.
What About Wrapping Larger Areas?
Full wraps and large films work on the same principles — clean surface, careful positioning, squeegee, then heat — but there are some differences.
I’ll be upfront: our own products are decals, and I haven’t wrapped a full car myself, so this part describes general industry practice rather than my personal experience. Always follow the film manufacturer’s instructions, since they vary.
- Wet or dry: Many wrap films have air-release channels, so installers often apply them dry with a squeegee. The wet method with soapy water is common for glass and large flat areas where you need to reposition. Which one is right depends on the film.
- Heat for curves: Installers warm the film so it can stretch around curves and recesses, then use heat again afterward (“post-heating”) so the film stays in shape instead of lifting back. Temperatures differ by film, so check the data sheet instead of guessing.
- Don’t over-stretch: Stretching thins the film and can change its color or finish.
- Edges: Edges are where wraps fail first. They are trimmed carefully and pressed down so they stay stuck.
- Curing time: Give a wrap time to settle before washing it, and avoid pressure washing near the edges at first.
For a large wrap job, practice on a small flat area first, and consider hiring a professional for complex curved panels. If you’re estimating how much film you need, try the car vinyl wrap calculator — it’s a rough planning tool, so measure the panels yourself before ordering.
Quick Checklist
- Clean with isopropyl alcohol
- Small decal → dry method; large decal → wet method
- Squeegee from the center outward
- Dry trapped water gently with low heat
- Don’t drive right after applying
- Remove the transfer tape after 2–3 hours, slowly and at a low angle
Frequently Asked Questions
Can I use dish soap for the wet method? A mild soap in a spray bottle is what we use. Keep the amount small: a few drops in a bottle of water is plenty. Too much soap can leave a film under the vinyl and weaken the bond.
Why can’t I just use water without soap? Plain water can work, but soap makes the surface more slippery, so the decal slides more easily while you position it.
How long should I wait before driving? Don’t drive until the trapped water has been squeegeed out and dried, and ideally wait until you’ve removed the transfer tape. Driving too early is the most common reason large decals peel or fly off.
How long before I can wash the car? Wait at least 24 hours before washing, and longer in cold weather. Avoid pressure-washing right at the edges of the decal in the first week.
Why are there bubbles under my decal? Usually a dirty or waxy surface, air trapped by pressing too fast, or water that wasn’t fully squeegeed out. Small ones may disappear on their own. For a stubborn one, prick it with a fine pin and press the air out.
Can I apply a decal when it’s cold outside? It’s not recommended. Below roughly 10°C (50°F) the adhesive doesn’t bond well, so move the car into a garage or wait for a warmer day.
Can I apply a decal over tinted windows? Apply to the outside of the glass when you can. Be careful with the inside of a tinted window, because aggressive tools or later removal can scratch the tint film. If you’re unsure, test a small area or ask your tint installer.
Can I reuse a decal after I remove it? Usually not. Once the adhesive has bonded and the decal is peeled off, it tends to stretch, crease and lose its grip.
What if the transfer tape pulls the decal up? Press the decal back down, lay the tape over it again, and give it more time. Peel the tape slowly at a low angle, pressing down as you go.
Is it okay to use a hair dryer instead of a heat gun? Yes, and for window decals a hair dryer is the safer choice. Keep it moving, and hold it far enough away that the vinyl doesn’t soften or warp.
If you’re looking for a design to practice on, you can browse the free vector decal templates on this site.
👉 5 Common Mistakes When Applying Vinyl Decals
※ LICENSE & TERMS OF USE
- Personal Use Only: This vector file is provided strictly for personal DIY projects and non-commercial purposes.
- Modification Allowed: You are free to edit, resize, or modify this file for your own personal use.
- No Commercial Sale: Mass production, selling physical items made with this file, or any commercial exploitation is strictly prohibited.
- No Redistribution: You may not re-upload, share, or resell the digital files (SVG/AI) on any other platform.
DISCLAIMER
This file is provided "AS IS" without warranties of any kind. DVG (Detail Vector Garage) assumes no responsibility or liability for any trademark, copyright, or legal issues arising from the use of this file.